
Pimoroni Grow HAT Mini
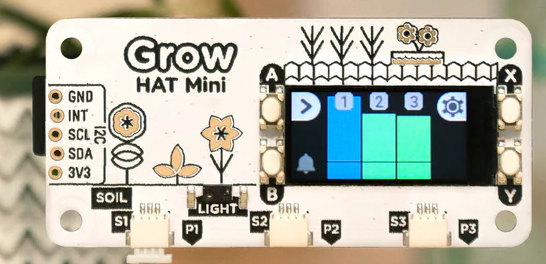
I ordered a Pimoroni Grow HAT Mini to water the tomatoes in my greenhouse. When I went to hook it up, I discovered that it needs a few updates to work on Trixie. Here's how I installed the latest dependencies and made some minor tweaks to get it running on the latest Raspberry Pi OS.
Contents
- Links
- OS Install
- Install OS Dependencies
- Download Source Code
- Set Up Python Virtual Environment
- Enable Devices
- Install the Hardware
- Verify i2c Device Found
- Apply Patch for Trixie
- Run the Monitor
- Next Steps
Links
- Pimoroni Grow-Python Source Code
- Pimoroni Docs
- I purchased mine as part of a kit from Pimoroni, but you can also buy them separately
OS Install
Most folks will want to use the Raspberry Pi Imager.
Also check out my related post: Command Line Only Install For Headless Raspberry Pi OS (Trixie).
Install OS Dependencies
# install deps
sudo apt-get update
sudo apt install -y git           \
                    libfreetype6  \
                    libopenjp2-7  \
                    python3-dev   \
                    python3-numpy \
                    python3-pil   \
                    python3-pip   \
                    python3-setuptools
Download Source Code
# cd into directory where you want to clone the repo
cd ~/projects

# clone project
git clone https://github.com/pimoroni/grow-python

# cd into repo workspace
cd grow-python
Set Up Python Virtual Environment
Set into your repository workspace and run the following.
# create python virtual environment
python3 -m venv --system-site-packages .venv

# source virtual environment variables
source .venv/bin/activate

# install python package from current directory
pip install -e .

# install dependency
pip install gpiodevice
Enable Devices
Counterintuitively, in the examples below, "0" means enabled.
Run these commands to enable i2c and spi. The commands should produce no output.
# enable i2c and spi
sudo raspi-config nonint do_i2c 0
sudo raspi-config nonint do_spi 0
Now, confirm the devices are enabled. Both these commands should output "0" to indicate enabled.
sudo raspi-config nonint get_i2c
sudo raspi-config nonint get_spi
Now reconfigure the spi0 chip select pin in /boot/firmware/config.txt. If you miss this step, when you run monitor.py, you'll see the error message: lgpio.error: 'GPIO busy'.
# update config.txt
sudo vi /boot/firmware/config.txt
#
# add this to the very bottom of the file (in the [all] section)
dtoverlay=spi0-cs,cs0_pin=14

# reboot
sudo shutdown -r now
Install the Hardware
If the hat isn't already installed, shut down and install it now.
I had to use a bit more pressure than I normally use when installing HATs. The HAT looked pretty shallow, but it ended up seating down further than I expected. It feels very secure and does not move around when I press the buttons on the HAT.
Verify i2c Device Found
# verify i2c enabled
lsmod | grep i2c
      i2c_dev                12288  0
      i2c_bcm2835            12288  0

# install dependencies
sudo apt install i2c-tools

# check device
sudo i2cdetect -y 1


# this is what you will see if your device is not found

           0  1  2  3  4  5  6  7  8  9  a  b  c  d  e  f
      00:                         -- -- -- -- -- -- -- --
      10: -- -- -- -- -- -- -- -- -- -- -- -- -- -- -- --
      20: -- -- -- -- -- -- -- -- -- -- -- -- -- -- -- --
      30: -- -- -- -- -- -- -- -- -- -- -- -- -- -- -- --
      40: -- -- -- -- -- -- -- -- -- -- -- -- -- -- -- --
      50: -- -- -- -- -- -- -- -- -- -- -- -- -- -- -- --
      60: -- -- -- -- -- -- -- -- -- -- -- -- -- -- -- --
      70: -- -- -- -- -- -- -- --

# this is what you want to see, everything looks good!

           0  1  2  3  4  5  6  7  8  9  a  b  c  d  e  f
      00:                         -- -- -- -- -- -- -- --
      10: -- -- -- -- -- -- -- -- -- -- -- -- -- -- -- --
      20: -- -- -- 23 -- -- -- -- -- -- -- -- -- -- -- --
      30: -- -- -- -- -- -- -- -- -- -- -- -- -- -- -- --
      40: -- -- -- -- -- -- -- -- -- -- -- -- -- -- -- --
      50: -- -- -- -- -- -- -- -- -- -- -- -- -- -- -- --
      60: -- -- -- -- -- -- -- -- -- -- -- -- -- -- -- --
      70: -- -- -- -- -- -- -- --
Apply Patch for Trixie
Check out my PR here, which contains the updates needed:
You can apply my PR as a patch using the following command. Run this from the root of the grow-python repo:
curl -L https://github.com/pimoroni/grow-python/pull/50.patch | git apply -v
Run the Monitor
# re-activate virtual environment
source ~/projects/grow-python/.venv/bin/activate

# run monitor
cd ~/projects/grow-python/examples
python monitor.py
# run directly without activating
~/projects/grow-python/.venv/bin/python ~/projects/grow-python/examples/monitor.py
Next Steps
Check out the Pimoroni guides: